Monday, January 12, 2015

Final Exam

(Question #3)

Final Exam

1. How has your thinking about art changed during the semester? Was there a particular unit that you learned a lot in? 

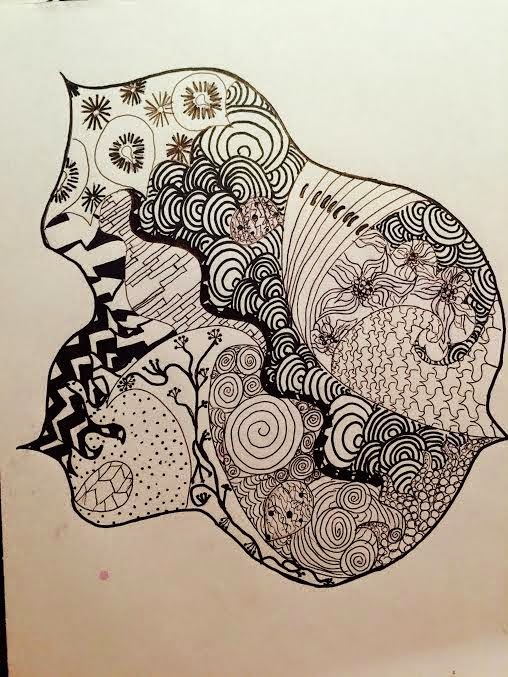
Throughout the semester, I learned that art is more than something to do for a fun free-time activity.  It can convey meaning, emotion, or even be functional.  I particularly learned a lot in the teen inspired/NCMA unit.  I also went from liking hard lines to liking angles and twists and curved lines (pictured at bottom).

2. What do you notice about how your art making skills, including how you interpret themes, have changed when you compare your drawing from the beginning of the course to your more recent one?

When I'm given a topic or medium for art, instead of just creating the first thing that comes to mind, I've learned to take multiple ideas (make a mind-map if necessary) and combine them into a complex piece.  I am now able to use my skills to take a simple concept and spin it to make a more interesting design.
Me under Gyre

3. What unit or project was your favorite? Why did you like it?

I really enjoyed the teens inspired/NCMA unit the most, not only because I learned the most, but also because it gave me so many options as well as a few ideas after I chose a piece.  

Fun Fact: I loved the creation, Gyre, from the NCMA so much that I went and visited over the holiday.  I also saw many of the pieces my classmates used as inspiration.

4. What did you like about this class? What could have made it better for you, in terms of learning?
Me at the NCMA
I love the fact that you can do anything in this class.  If you want to work with a strange or different material, the teachers are more than happy to help and show you what to do along the way.  A few more demonstrations may have been helpful, but figuring stuff out on your own is part of the fun, right?
My first art piece
(Theme: Beauty)


My final art piece
(Theme: Beauty)


Question #1


Question #1


Pinterest boards I created for art ideas:

Other favorites from the NCMA:

Saturday, January 10, 2015

Current Event

Current Event Art

     When I heard about the Charlie Hebdo shooting it was a real shock to me.  I decided to make my art a flag with a target because Paris was targeted by terrorists.   I picked oil pastels for this project so the colors would stand out.  My heart goes out to all the victims and their families.

Thursday, December 18, 2014

NC Museum of Art

Gyre


Double Hearts

     I made a clay sculpture based on the artwork "Gyre," created by Thomas Sayre,
at the NC art museum.  Gyre is an outdoor sculpture of three ellipses.  It was created in 1999 out of concrete, iron oxide, steel, and dirt.  It's about 25 feet tall and located in Raleigh.  I was drawn to this piece because of its modern look.  
Gyre


Fun Fact: Gyre was derived from the word Gyration, which means spiral, vortex, or tornado.
   
When I was first coming up with ideas I wanted to go along with the 3 shapes standing up on a flat surface.  When trying to execute this plan, I found it hard to make the heart shapes stand up.  So, I scrapped it and went with the one heart and a mini heart.  I carved almost a moat around the mini heart so it could hold jewelry or something.  The purpose of the mini heart was to keep the illusion that Gyre has.  When you look at Gyre from different angles it looks completely different, so that's what I tried to accomplish in my work.

(Final Picture coming soon! It's in the kiln right now.)

Tuesday, December 16, 2014

Stop-Motion Film

When Pigs Fly

     My group and I created our stop-motion project out of yarn and paper. It's a pretty easy thing to do if you ask me.  
Check ours out: When Pigs Fly

Here's how you can make your own:

1. Form an idea.
2. Download the stop-motion app (to make it easy).
3. Gather materials.
4. Set up back-drop.
5. Move items slowly.
6. Take a picture every time you move something.
7. Repeat steps 5 and 6 until you reach your desired outcome.
8. When finished, save and share!

Saturday, November 1, 2014

Artists Solve Problems

Artists Solve Problems
     When the artist solve problems unit was first introduced, I struggled with coming up with ideas.  Our first task of the unit was to brainstorm and come up with a functional way to change the way people do things.  With the example of piano stairs, I came up with a table that lights up different colors if there is no trash on it at the end of the day.  Who wants a non-glowing table right?  I really learned how to come up with different ideas, take aspects from each, and combine them together to make a pretty wicked final idea.

     The next thing I did in this unit was make a marble-drop-like creation.  The criteria was having to use all free materials.  This was definitely my hardest challenge in the artist solve problems unit. It took a day or two of experimenting to perfect the flow of the water.  My plan was instead of dropping a marble, you pour water into it!  I found a cardboard box, rocks, water bottles, and a larger bottle to use.  Originally I wanted to have the water flow out the bottom, but then I thought it would be cool if the water could be stored in a container underneath,  so that the water-drop could be used anywhere.  The final result had grass and more rocks added to it (not pictured yet).

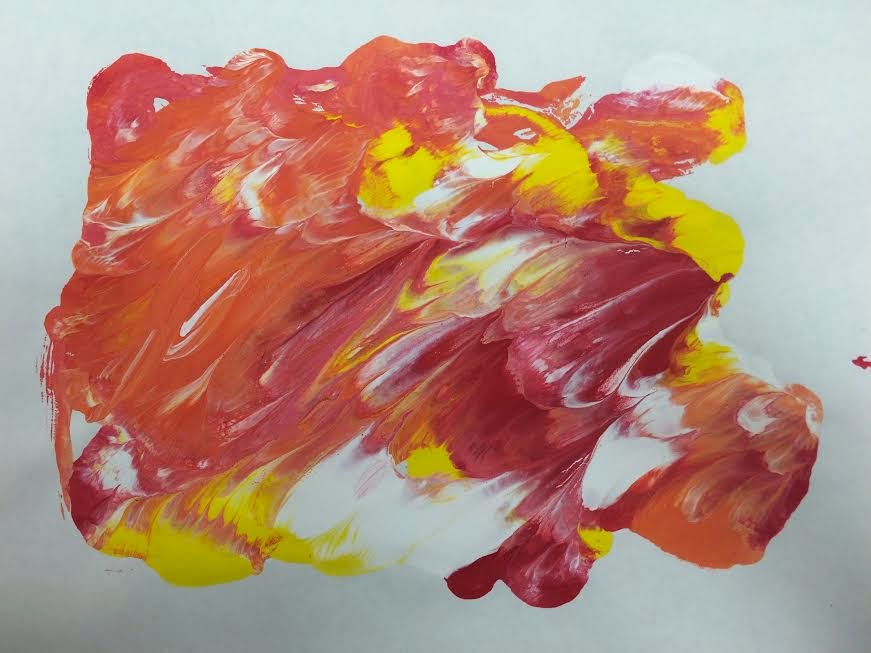
     My final and fun project was my chosen limitation.  I chose to use no paintbrushes to create a cool, modern form of art (mono-printing) with paint.  After trying many different ways of applying paint (dripping, spraying, wiping, finger painting, etc.) I found something I liked.  I dripped paint onto palate paper and then folded the palate paper in half.  I placed a sheet of paper on top and got an awesome print that I really liked.  I added three more and ended up with a series of four.

     I honestly don't like the idea of doing art while having a limitation, simply because I don't like being limited!  I did, however, think it was an interesting concept to try.  My final project isn't something I would typically do, so I guess this project was successful in making me try new things.


Sunday, October 26, 2014

Artist Steal


 Artist Steal
     At the beginning of this unit, I was asked if I thought copying was okay.  My answer was instinctively no, until I realized that it's ok to steal certain ideas and use your artistic ability to make it your own.  For one of my artist steal projects, I combined a German Shepherd silhouette and a zentangle. As you can see, the picture in the top left was the silhouette shape that I "stole".  I surprisingly learned a lot about proportion during this unit while trying to take the tiny image and enlarge it for my huge sheet of paper!  (The zentangle was also very fun to make.)


 Final
This was my final artist steal project.  I found a creepy wooded picture that I liked online and printed it out.  Then, I layered paper and bark from my tree on top.  I added some flowers for extra color and 3-D look.  I got the idea for the rip down the page look from pinterest.

This was the example I used to create the look for the monster claw opening the paper above.
   2 in 1
 This artist steal project was one I had a lot of fun with.  I knew instantly I wanted to do something that mixed princess faces with something else.  Pinterest gave me the expressions for the princesses' faces, and I looked up a picture of the ""Totally Spies" girls for the bodies.  I call this project "Totally Princess." Haha.  This unit really taught me a lot on free-handing


details.  I don't like tracing, so I do the
best I can with capturing the details while free-handing!  I also learned that no idea that anyone will ever have is original.  There's always somewhere you derive your idea from.


http://www.pinterest.com/laurenaudycki/art/

Saturday, October 11, 2014

Art 2- Artist Observe

 Artist Observe
     For my final artist observe project I created a still-life drawing of Disney objects.  I used elements that I learned throughout this unit such as contour lines, proportions, composition, horizon line, and others. The rose is composed of contour lines (not picking up the pencil) to give it a "flowing together" look.  Proportions were probably the most important element in this artwork because everything needed to look realistic.  The horizon line is the edge of the table, at eye level.  One thing that many of my other peers pointed out was the nice use of tints and shades in the genie lamp to bring out an interesting 3D look.  Tints are colors that you lightened with white to show highlights.  Shades are colors darkened with black ,or its complement, to show shadow.  To truly make this an artist observe piece, I brought in an apple and feather to observe.  I also utilized pinterest for the other objects.

     How did I get the idea?  Well I love disney, and wanted to create something with multiple objects.  This still-life theme interested me more than perspective or scientific drawing.  I thought, what's something with many parts that I can bring into one? Disney princesses of course! This is what each object represents: Apple = Snow White; Genie lamp = Aladdin; Glass slipper = Cinderella; Feather = Pocahontas; Rose = Beauty and the Beast; Spindle = Sleeping Beauty; Bubbles = The Little Mermaid; Window in back showing Pride Rock = The Lion King.

     Another thing I did in the artist observe unit was observe perspective.  I love the realistic aspects I got when using one, two, and three point perspective.


     I learned a lot from drawing things around the high school campus.  The trailers were one of the first steps on my way to understanding perspective.

     This is a before and after drawing of my phone.  The first one I drew by memory, the second I observed while I drew.  You can see there is much more detail and correct proportions in the second.


     This is the corner of the school hallway after I learned how to create vanishing points. (I also learned it was hard to keep the correct vanishing point when they were off the paper.)


     I was shocked to realize how little I knew about correct proportions before this unit.  I drew the first two pictures above with little understanding of proportion.  The third picture was drawn while looking at another teacher, and using some pointers my teacher gave me. 


    This final proportion drawing was completed with much more understanding than I had had before.


Wednesday, January 15, 2014

Wire Project

Wire
(Small Project)
    
    For our final in-class project, we were able to choose anything we wanted to do.  I thought it would be fun to work with a material I had never used before.  I scanned the room for inspiration, and was drawn to my bracelet.  My bracelet has a design on it that means "Path of Life."  The symbol represents all the twist and turns in life (hence the name).  I used a couple different sizes of wire before deciding I liked the looks and feeling of the thicker wire.  I was proud of the way this turned out and would definitely use wire for another project.

Thursday, January 9, 2014

Repetition

Repetition
     I used the word repetition for the idea of making multiple objects.  I first made a flowchart for ideas. Then, I made a couple sketches and picked the one I liked most.  I decided on paint splatters.  I made them out of clay, and to finish I glazed them different colors.  I feel like the best part of this project was the glaze because all the colors came out thick and dark like I had wanted.

Marble Drop

Marble Drop
     For this project I worked with my friend Cara.  Our theme is Boys vs. Girls.  At first, we had 3 members in our group (1 boy, 2 girls).  It took us a long time to come up with a idea for the project.  We all had very different ideas, leading to the Boys vs. Girls theme.  Our hardest challenge was getting the marble to drop from the motorcycle on top, into the hourglass (box).  Cara and I made the tracks out of a variety of different materials.  The marble travels down going from one side to the other the whole way.  If I could change one thing, I would make our marble drop last longer.  The marble probably finishes the whole drop in about 5 seconds or less.  However, I loved how our marble drop was very unique. It was a fun project. 

Relief

Relief
     There are 3 types of relief.  Sunken, low, and high.  My piece falls under the sunken relief category.
Sunken- the sculpture is carved into or receding into itself.
Low- the sculpture is raised a little bit.
High- the sculpture is raised a lot.
I chose to work with clay for this project because its easy to work with.  I finished off with the paint so I could use a lot of colors.  I am most proud of the way the moon turned out; its soooo smooth.  If I could change one thing about my piece, I would make the grass a more realistic color and texture.

Monday, November 4, 2013

Vessel


     Vessel

To create my vessel, I chose to use clay.  There are so many possibilities with clay and I find it easy and fun to work with... until this project began to unravel.  I thought it would be cool to have a vessel you can put a candle under to illuminate the inside.  When I began this project I didn't know where to start.  I decided to mold the clay around a bowl and then attach the 2 halves when both were complete.  When I tried to peel the clay off the bowl, it wouldn't work.  I became very impatient with it after trying for a day or two to get it off without ripping.  I had to resort to cutting it off and starting over.  After I got the old  clay off, I again molded around the bowl (using the old clay and patching it together), but put newspaper underneath to ensure it not sticking.  I was able to get both halves off and attach them successfully; although I never got it to look exactly like I had originally hoped.  The shape looked more like a football and I had to keep patching and pressing it until it looked somewhat decent.  It got to the point where I said it was fine and had it fired in the kiln.  After it was fired I decided to go with glaze because it would hide any major imperfections and would look a lot better.  I wanted a bright red glaze, but the closest I could fine was a orange coral color.  I put it on and put many coats of it too; I really wanted it to be the darkest it could.  After the glazed piece came out of the kiln I was amazed!  It was the color I had originally wanted, and it actually looked round!  I took it home and I am so happy it matches and looks great in my living room, just like I wanted. 

Land Art

Land Art
Pinterest: http://www.pinterest.com/laurenaudycki/art/ 

     Land art is anything you can create or design using aspects of nature to form a temporary art piece.  I designed this piece because I wanted to keep the nature aspect for the whole thing.  I took 8 different leaves all of different colors, and glued them in a sun like shape.  They are attached to the main leaf by leaf stems. If I were to do this project again, I would have tried to complete it all in the same day so some of the leaves wouldn't lose the very vibrant color they had on day one.

Tuesday, September 24, 2013

Van Gogh Art Article


Lauren 
Sudkamp
Period 4
Sep. 24th, 2013
Van Gogh’s The Starry Night

     Van Gogh’s recently discovered painting is getting a lot of buzz and excitement, just 

like one of his old classics, The Starry Night did.   Yes, Van Gogh is and was very

popular and very successful with all his pieces.   All his paintings were greatly

 recognized, but today when you walk into a store you are most likely to see a 

recreation of the Van Gogh painting The Starry Night.   There are many aspects that 

made this painting separate itself from the others and shine, such as the captivating 

sky.

     Many people said this was the painting that made them feel calm and at ease... even 

happier.  It is said that the town at the bottom of the painting has dark colors that spark 

our interest.  By adding the pops of yellow and white the whole painting flows together in a well crafted 

piece of art.    The most interesting thing people found about this art was that it has a large dark structure 

off center.  No one is for sure about what it is, which makes it fun.  The viewers get to interpret what they 

are looking at.  Most people said to see it as a mountain or a leafy bush. 

     Van Gogh will always be one of the first names you think of when you hear the work art.  He was 

amazing, and who’s to say he doesn’t have plenty more paintings that people can’t credit him for yet.  All 

the buzz about this new painting is exciting and maybe it will go down in history as one of the most

 popular just like The Starry Night.


Click:  Works Cited